
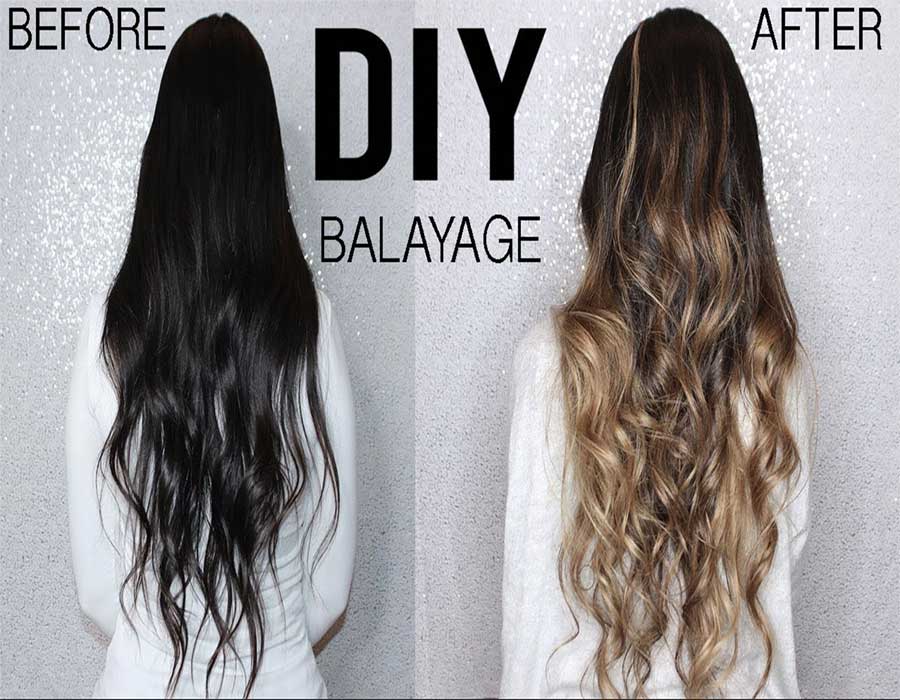
This DIY Balayage is necessary for those who are always in a time crunch. Busy schedules and demanding tasks usually deprive girls like me the time to visit the salon as often as I should. Because of this dilemma, it is impossible to maintain any hair color that I want.
As an answer to the crisis, balayage is the transcendent hair color to have. This just happens to be that type of hair color that doesn’t need obsessive upkeep. It isn’t easy to find the time and set aside money to have a touch up of hair color every three weeks.
A salon visit amounting to 200 USD per visit is not exactly a practical move. Given that the balayage is a low-maintenance hair color, I have come up with a DIY version that yields the same beautiful result.
Don’t worry! Anyone can do this, even if you don’t have professional experience in coloring hair.
What is Balayage?
This hair coloring technique is actually a French word that means “to paint” or “to sweep”. Its effect is a natural, sun-kissed hair color. When you balayage your hair, you sweep the chosen hair dye through your strands. It is as if rays of sunlight have touched them ever so slightly.
You might think that balayaging requires complicated and often scary materials such as a heat cap, tin foil pieces, or strong bleach. It doesn’t, so you can cross that thought from your mind.
This DIY balayage is very beneficial to you. All you need to do is dye your hair with your hands, allowing you to have more control over your chosen colors.
Difference Between Ombre and Balayage?
Balayage is not like the other treatments you may have had already:
Highlights
This treatment requires attention and rigor. Balayage just needs artistry. It doesn’t even mandate that you color your hair at the roots. Your aim is to just emphasize the natural tone of your hair and not change it fully.
Ombre
The name is also a French word, meaning “shaded” or “shading”. You know it’s ombre if the ends of your hair are of a lighter color than at its roots. Ombre gradually lightens your hair, which culminates in a two-tone color.
The darker color starts at the roots and then spreads to mid-length. Then the lighter hair color is then applied to the tips of the hair. Subtlety is what the balayage has that ombre doesn’t.
The color transition is not that pronounced. Instead, it is smooth, natural, and elegant. This is achieved only by coloring each strand individually. Also take note that ombre is a result or an effect, while balayage is a hair coloring technique.
How to Balayage at Home
Tired of the expensive salon visits for your hair color treatments? Perhaps it’s time to consider balayage at home.
It may sound intimidating, but it is doable. With the easy tutorial I’ve set up for you, you’ll be able to learn a subtle and effortless way to achieve that stunning color that makes your hair looks like it has been kissed by sunlight.
Again, you don’t need to stress about the accuracy of your strokes. You just need to recall a bit of the watercolor lessons you had when you were a kid. This is all you require to hand-paint your hair and produce the subtle highlights that you want.
You can even get a kit that allows you to touch up your colors for only 28 USD. Just remember to place a damp towel nearby so you can clean excess dye on your face or your gloves.
Things you’ll need
- L’Oreal Quick Blue Powder Bleach (get 3 packs for long hair & bleach smaller section)
- Clairol Professional Pure White 20 Vol
- Ion Keratin Smoothing Masque
- Clairol Shimmer Lights Shampoo + Conditioner ( to avoid hair brassiness/ to avoid hair to get orange)
- Wella Color Charm Blonde Hair Toners in T11 & T18
- bowl and brush or applicator bottle
- Teasing brush
- disposable gloves
Step by step instructions
Step 1
Read and follow the instructions from the box
You should select colors that are two to three shades lighter than your hair’s natural color.
Though you’re already used to the brand of hair dye you have been using, still perform an allergy test. Allergies can develop over time.
Tip: Remember to use gloves and apply cream or Vaseline on the skin near your hairline, ears, and back. Doing so prevents dye from staining your skin.
Extra Tip: It is highly recommended to do a strand test prior to anything, to determine the exact time you should leave the color on to achieve the desired color change.
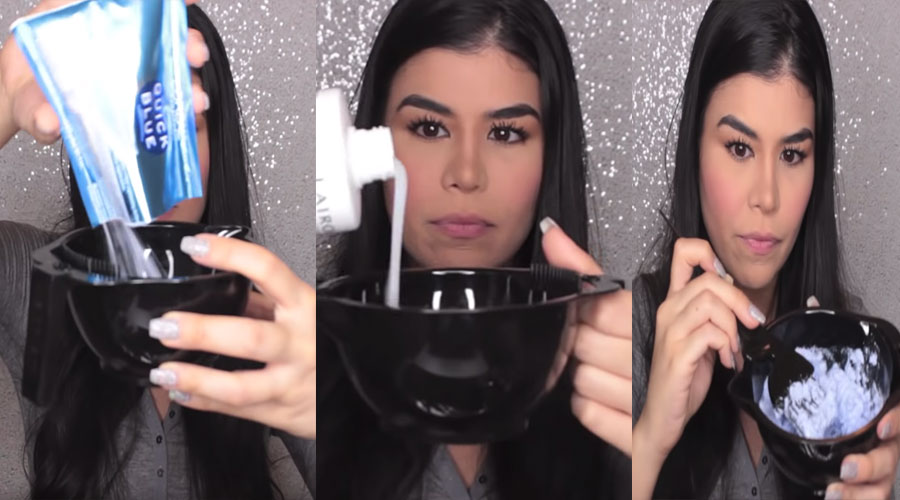
- Mix the L’oreal Quick Blue Powder Bleach and the Clairol Professional Pure White 20 Vol
- Mix well & set aside.
Step 2
Clip your Hair up

Layering is important in balayaging because it allows you to color different segments of your hair to create depth. You can choose to have as many layers as you want. Pull a section of your hair up. Secure it with a clip or a knot. Then, you can start with a thin layer of hair.
- Start with clean, dry hair. Once you’ve laid out all of the contents of the package and mixed your color to a creamy consistency, section your hair into workable areas.
- Use the tail end of the comb to create top, middle, and bottom sections separated out in a halo-esque part around the head, from ear to ear.
Step 3
Tease and diy balayage twist
The objective in balayaging is to incorporate the lighter color into your natural hair color. Maintaining your naturally colored roots is vital in maintaining the hair color effect.
- Wear a disposable gloves. Create a middle division on your hair.
- Run your comb from that center point to your left ear and then to your right ear.
- Now that you have 4 sections of hair, it can be easier for you to work.
- Twist sections then twist. Twist one section of hair first. Tease the beginning point of that twist to prevent the dye from getting too close to your hair roots.
Step 4
Apply the Hair Dye
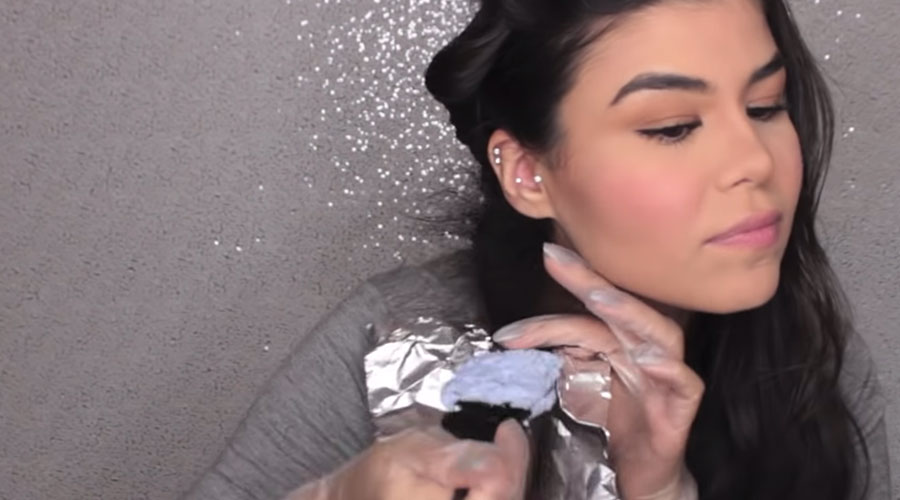
After teasing the beginning point of the hair roots, start applying the hair color at the ends of each section. Color them completely and then apply color again from the mid-length of the section down to the ends.
You can use a brush to spread the color on your strands. You can use your fingers to have a more natural effect. Keep applying the dye, leaving the roots alone. Naturally, the roots are the most resistant to sunlight exposure de-coloring.
Step 5
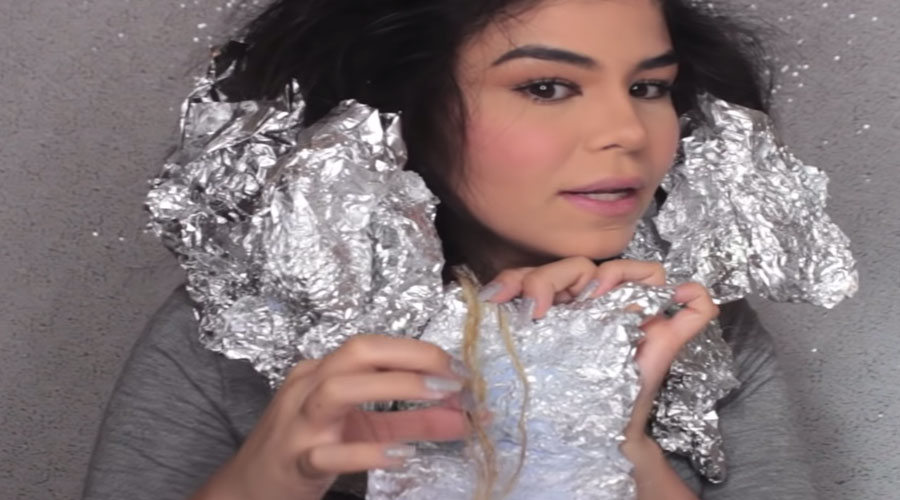
Secure The First Section
Use hair grips to secure the hair whilst you work through each small section.
Clip the section of hair that you’ve worked on already, separating it from the sections that aren’t done yet. This allows you to work quickly and easily.
Step 6
Release Another Hair Section
Don’t be afraid to color through the free-hand technique. In balayaging, it is not an issue if your highlights are not symmetrical. If you color freely, you will have a more natural look.
Work through the hair strands in each section to ensure full saturation. Do small section at a time (important).

Step 7
Apply the Finishing Touches
You have the power to control the amount of color you want to use in your balayage. It is also up to you to decide which section you want to color more.
A good example is during summer months. You would want to put more highlights around your face to emphasize the highlights you have in the rest of your hair.
Step 8
Rinse, Apply Treatment, And Dry Naturally
Rinse, treat, and dry. After rinsing the bleach, apply the hair toners. Reading the instructions on the kit again to make sure you don’t leave the color on longer than it should be. Rinse your hair with lukewarm water.
Step 9
Apply a hair toner (Wella Color Charm Blonde Hair Toners in T11 and T18 ) (check the product’s instructions) if you must and then treat it after. Rinse your hair again and leave your hair to dry on its own.
After rinsing the hair toner, apply the Ion Keratin Smoothing Mask or any of your favorite deep conditioning hair mask. Let it sit for about 3 minutes and rinse thoroughly.
The Result

How long would it takes to do DIY Balayage?
Considering that sectioning off the hair can a bit of time, this could actually takes up to an hour, depending on the desired highlight effect you want.
The better you section off the hair, the more efficient use you can make of the time you spend on achieving your DIY balayage.
Extra Tip: It is highly recommended to do a strand test prior to anything, to determine the exact time you should leave the color on to achieve the desired colour change.
Optional Step if you have very dark hair
If your hair is really dark and you see that the dye color developed into a brassy shade, generously apply hair toner over the dyed hair and keep it on for 20-25 minute. Wash off and style as normal.
Styling Maintenance after the balayage
It is only natural for your hair to dry out because you treated and colored it. Always remember to moisturize your newly highlighted hair. It will also help your hair look more vibrant if you give it a hot oil treatment.
The effects of professionally done balayage are similar to those of a DIY one. Of course, you cannot deny that a salon can offer you various treatments that you cannot give yourself easily.
Yet, balayaging your hair is much more practical and quicker as long as you can squeeze in the time.
Do your DIY balayage correctly and you can enjoy that sun-kissed effect, anytime, anywhere.
- Moisturizing hair oil
- Heat protective spray
- Your hair dryer
Watch the Video Tutorial for DIY Balayage:
Credit: MariamIssa